

How to Set Up a Pop-Up in Squarespace 7.1: Step-by-Step Guide
Pop-ups are a powerful tool for capturing visitor attention, promoting special offers, and growing your email list. If you're using Squarespace 7.1, you're in luck! Squarespace makes it easy to set up pop-ups without any coding knowledge. Squarespace also provides various customization options. You can choose a layout, add text, images, and buttons, and even modify the colors and fonts to match your website's branding. In this step-by-step tutorial, we'll guide you through the process of creating a pop-up within your Squarespace website. Let's get started!
Step 1: Log in to Squarespace
To begin, log in to your Squarespace account. If you're new to Squarespace, sign up for an account and select the 7.1 version of the platform. Once you're logged in, you'll be directed to your website dashboard.
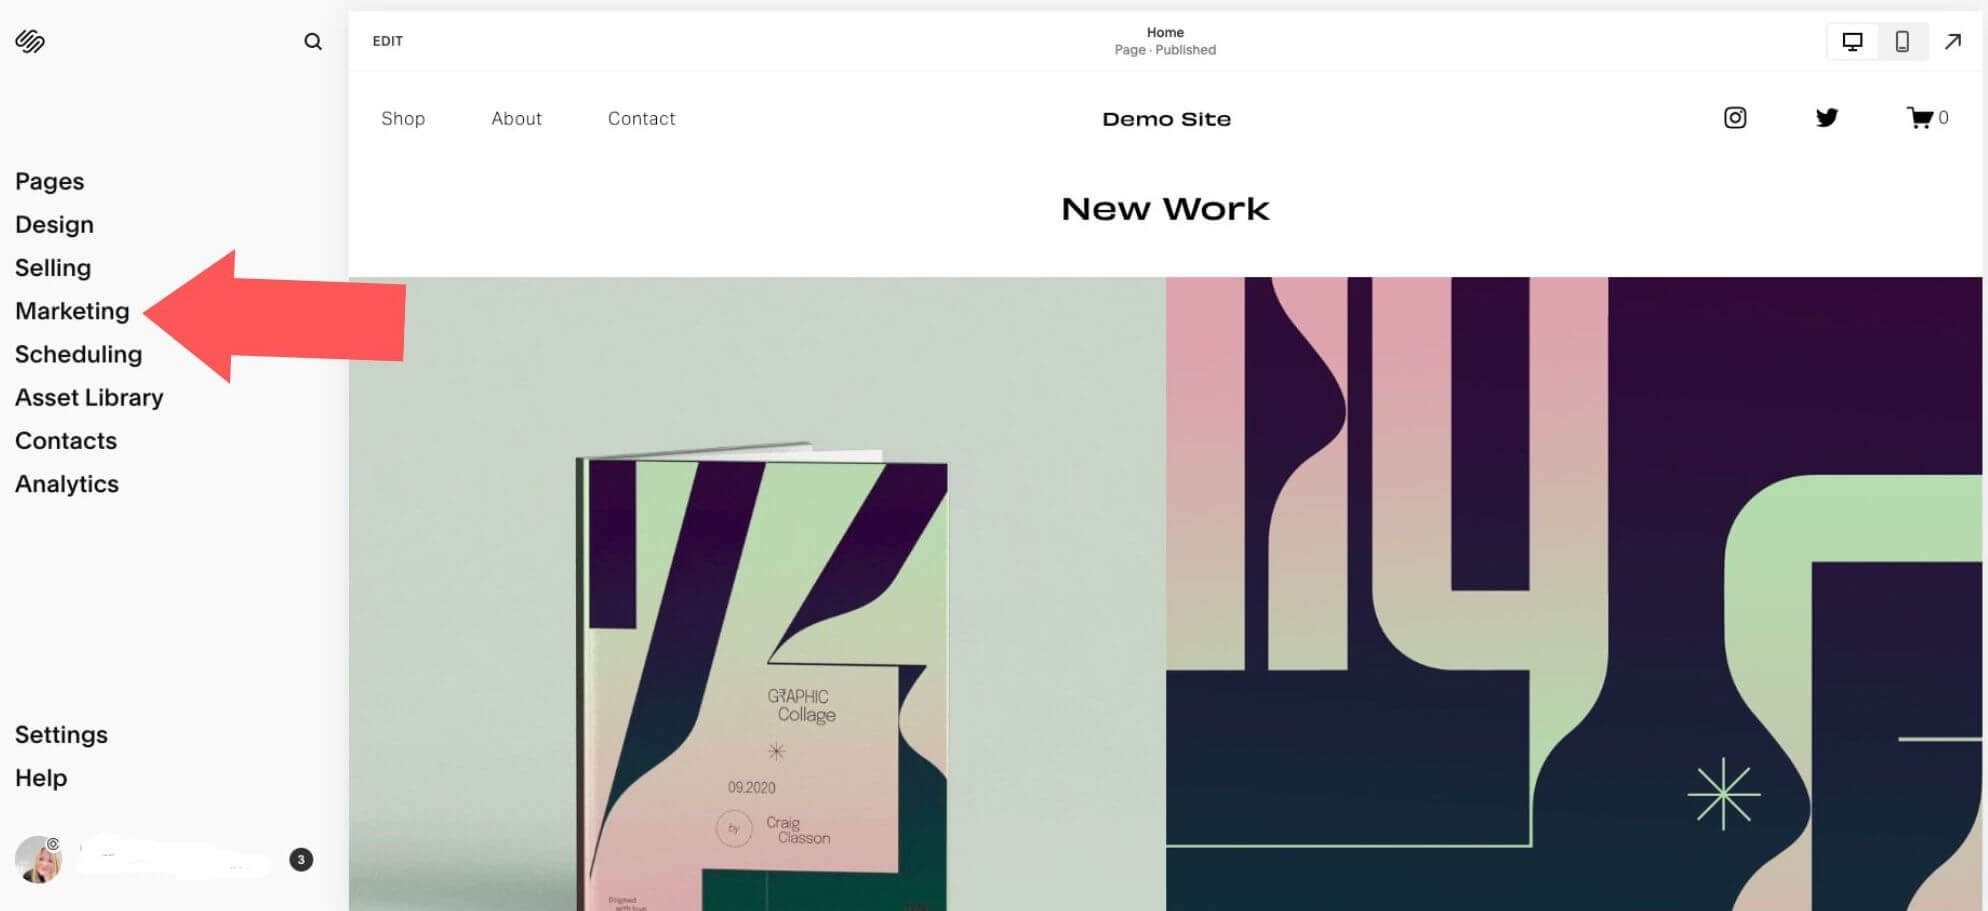
Step 2: Access the Marketing Panel
In the Squarespace dashboard, locate the left-hand panel and click on "Marketing." This will open the Marketing panel, where you can access various marketing tools for your website.
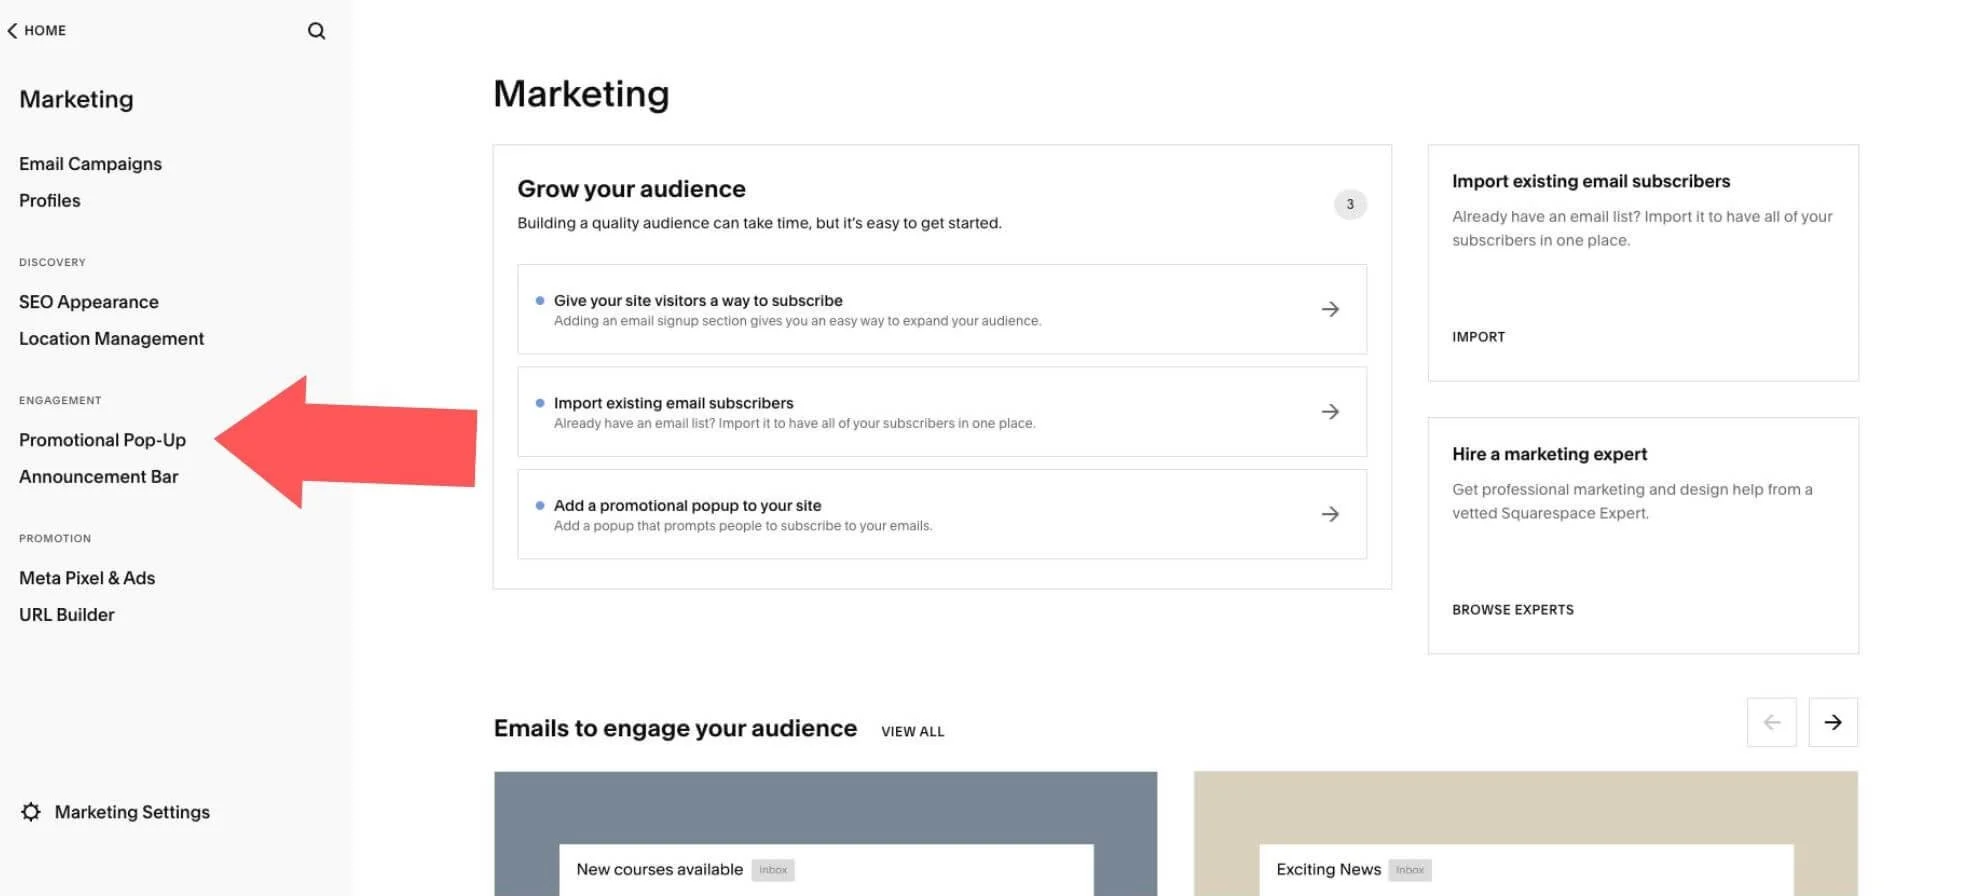
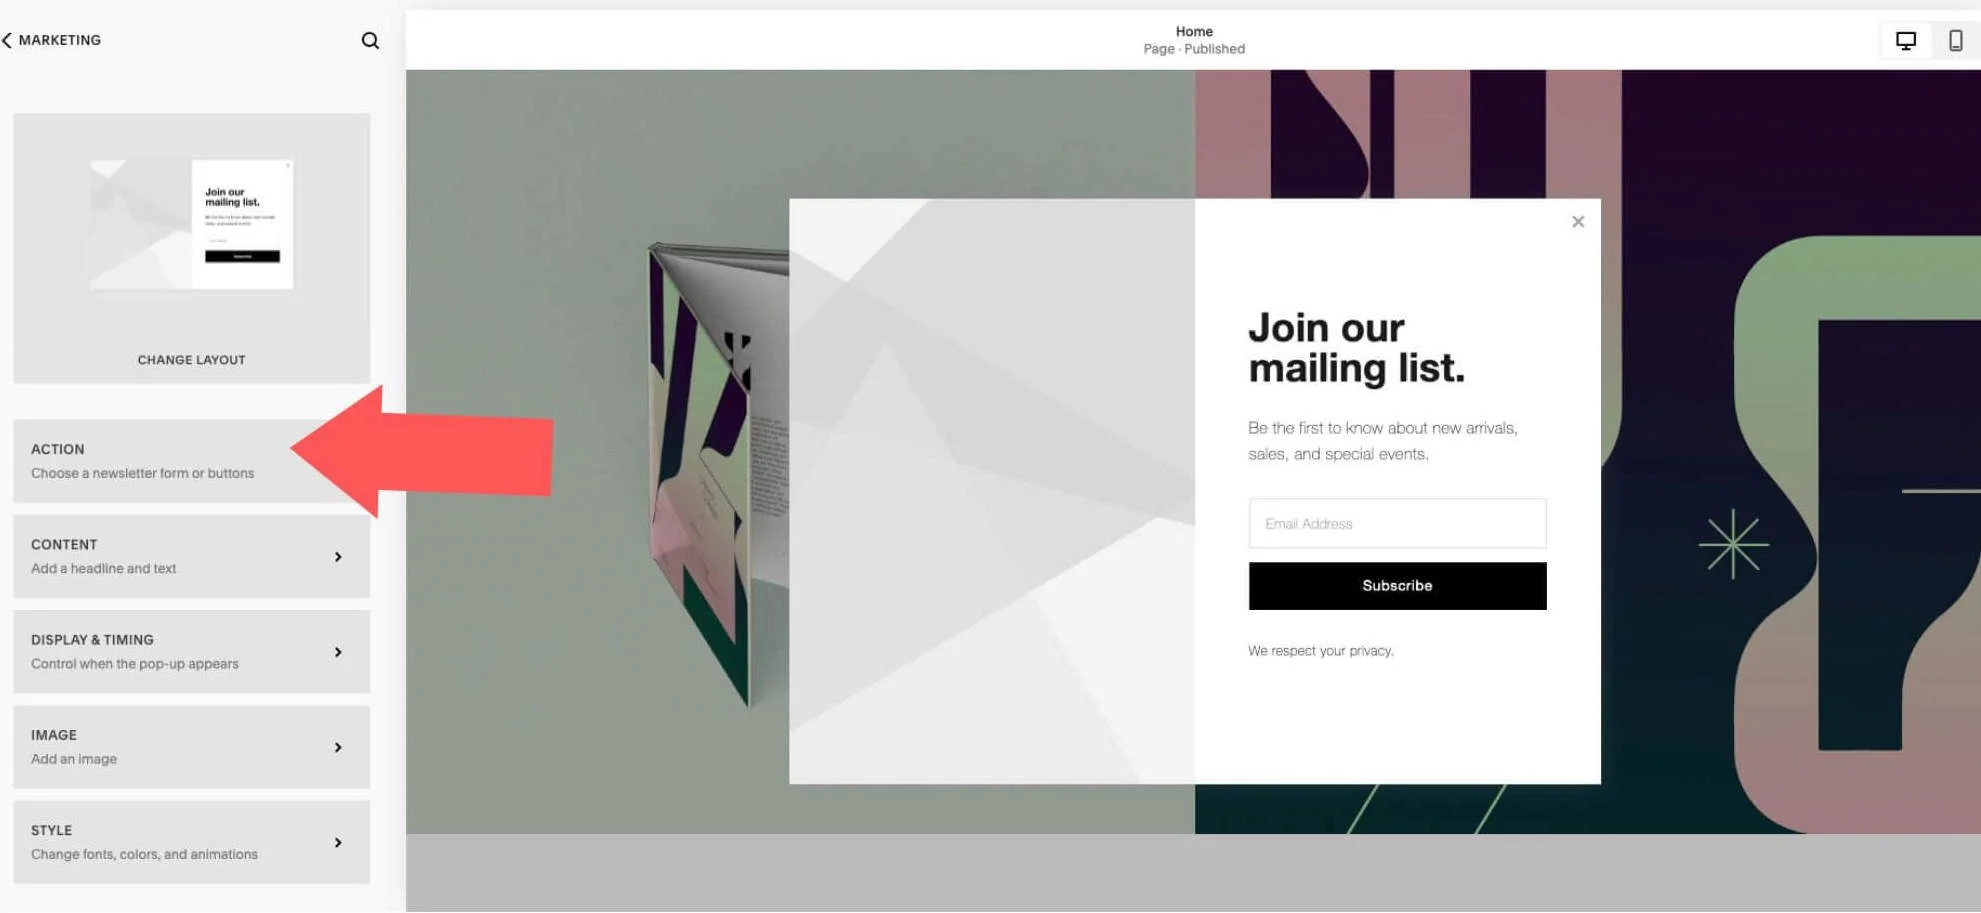
Step 3: Choose “Promotional Pop-Up”
Within the Marketing panel, click on "Promotional Pop-Up." Here, you'll find all the settings related to pop-ups on your Squarespace site.
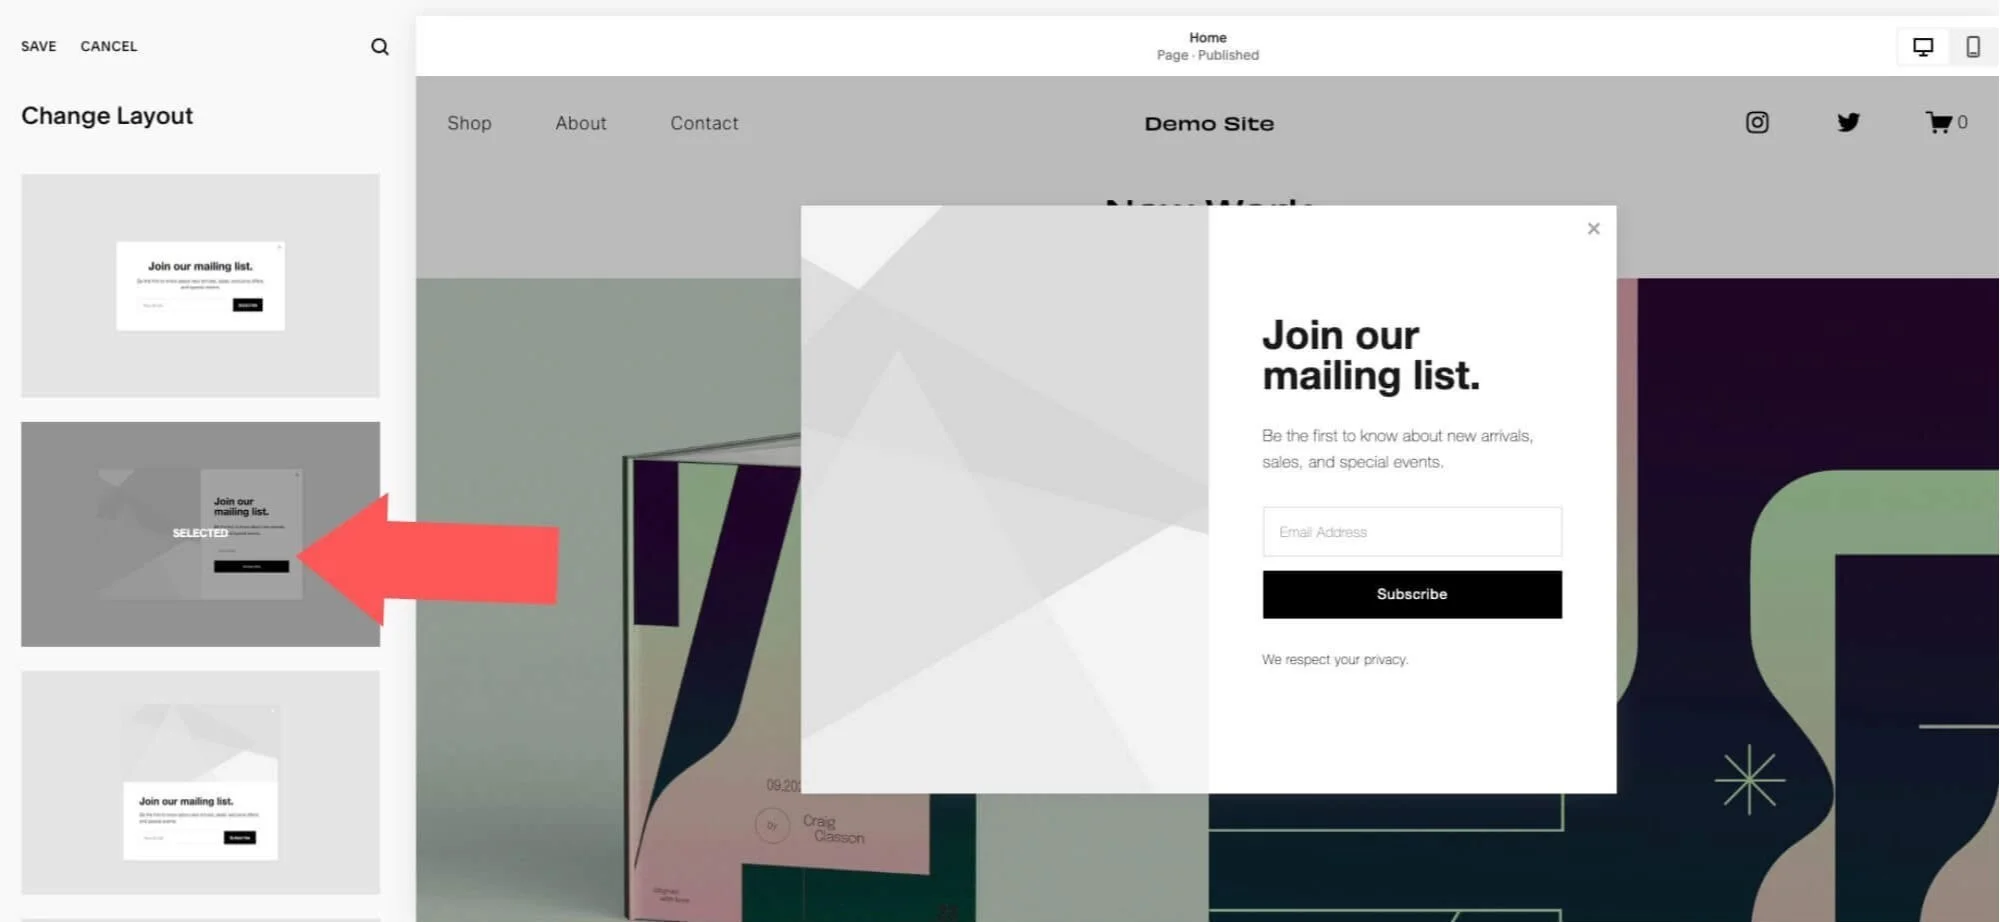
Step 4: Change Layout
A pop-up settings window will appear. Please note that an upgrade is required to use this feature (you’ll need the Squarespace Business Plan). I highly recommend this plan based on all the additional features, including this powerful marketing feature.
Next, click on “Change Layout” to select the type of pop-up you want. You’ll find various layouts, some smaller, floating pop-ups, and a few that are full page.
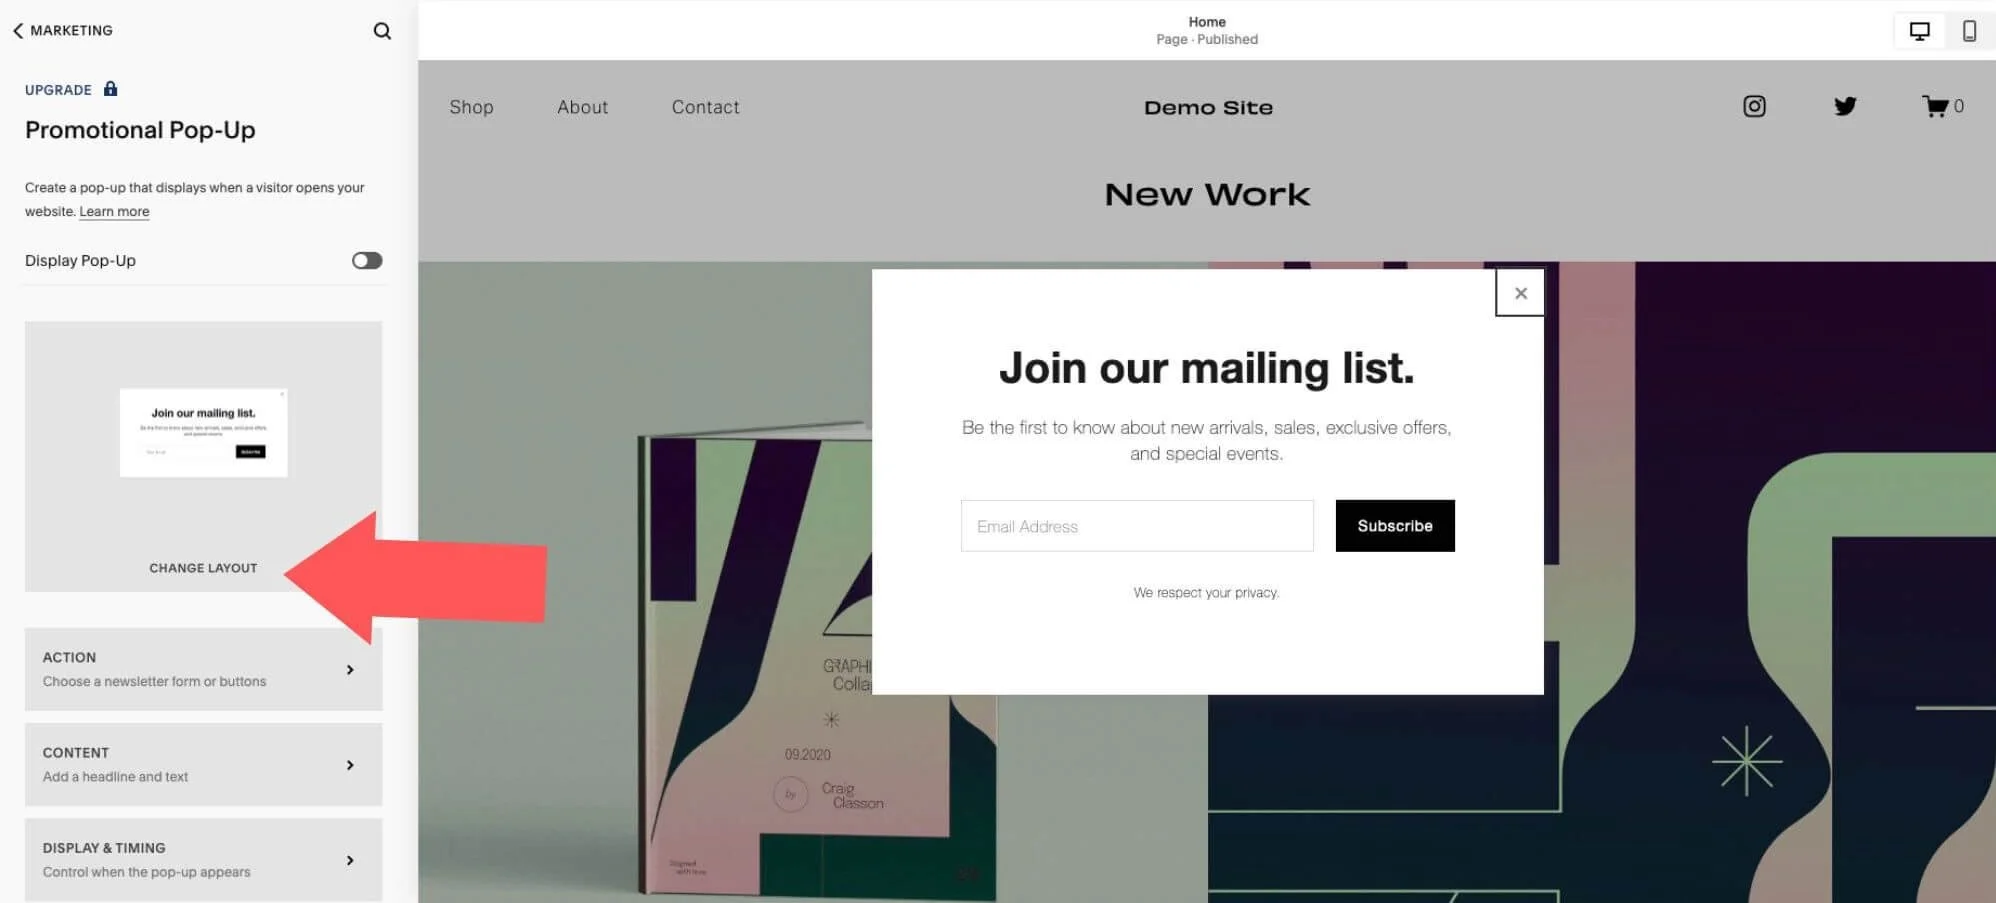
Once you’ve selected a pop-up design, click “save” in the upper left corner.
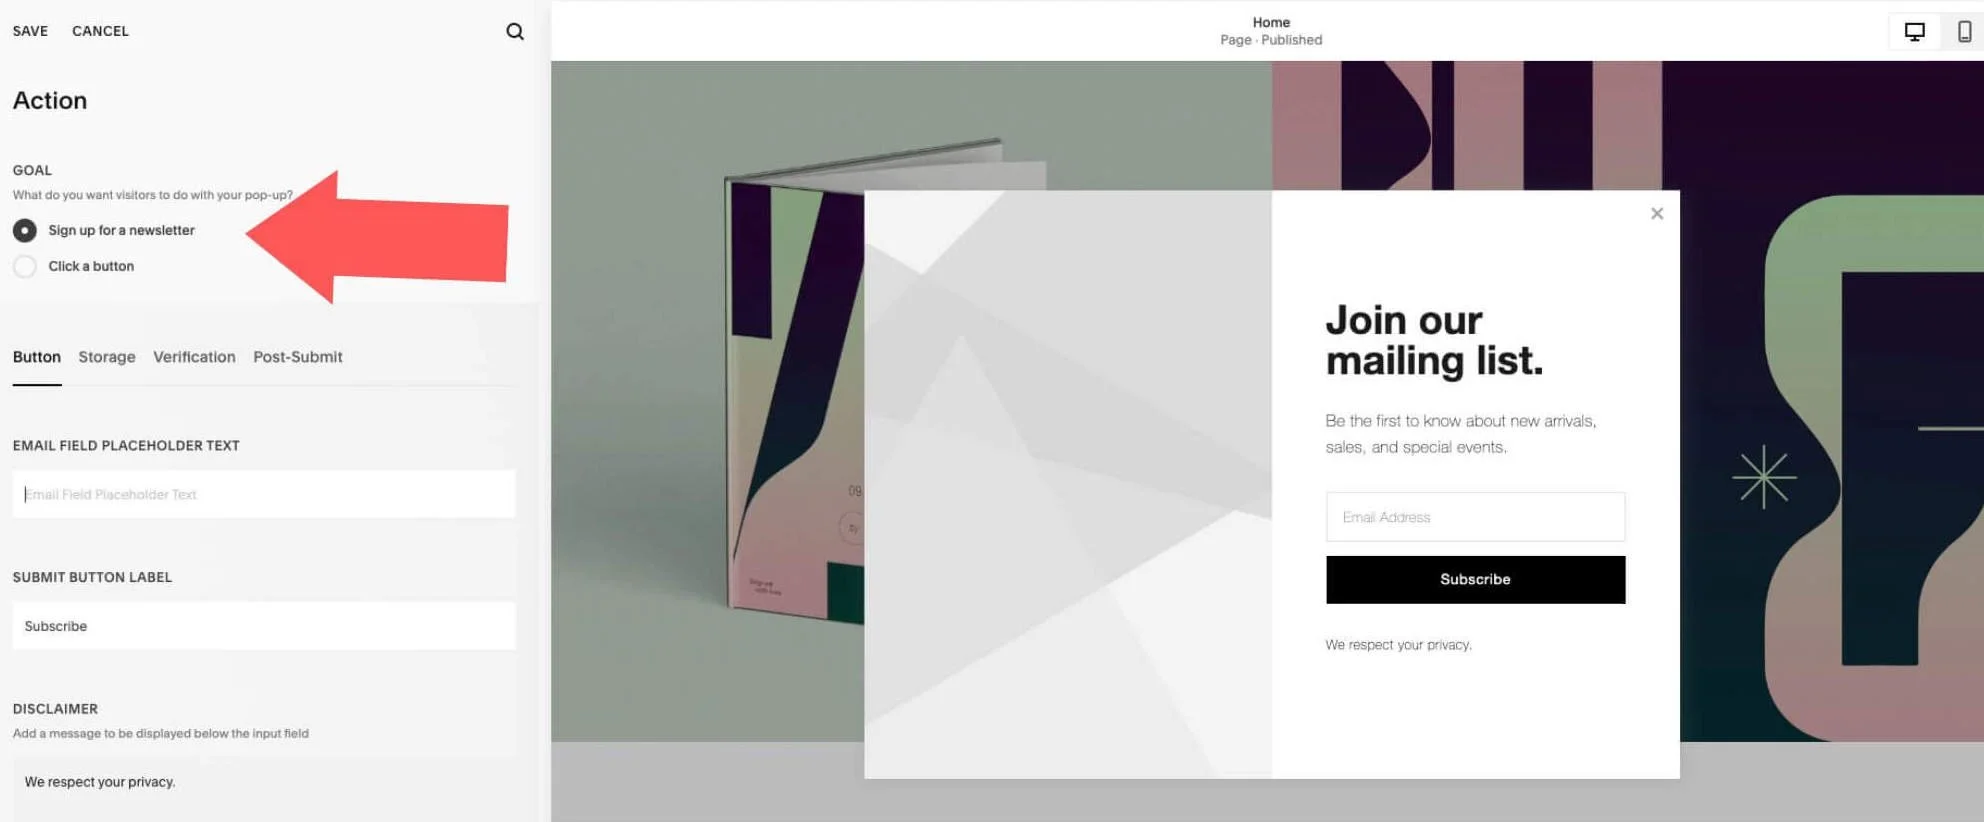
Step 5: Select “Action” Settings
Next, decide if you want to use the pop-up for email list-building, or to direct traffic to a specific page on your site.
SIGN UP FOR A NEWSLETTER: If you’re going to use it for list-building, you’ll need to enter some more information:
BUTTON: What the button call to action is. In this case, it is ‘subscribe” but you can change that.
STORAGE: What email service you will connect to your pop-up form. Squarespace Campaigns is the default setting, but you can also select from additional services.
VERIFICATION: You’ll need to set up a verification for new subscribers if you elect Squarespace Campaigns, but it is optional with other services. Do turn on the reCaptcha setting, to filter out potential spam.
POST-SUBMIT: This is the message subscribers will see when they enter their email address. You can edit that message at will.
Click save.
CLICK A BUTTON: This second option will lead subscribers to a specific URL, so you’ll need to enter one or more URL’s as it applies. This is a great option if you’re promoting a specific sale, event or a new collection of work, for example. It’ll help get your site visitors where you want them to go with less steps.
Click save.
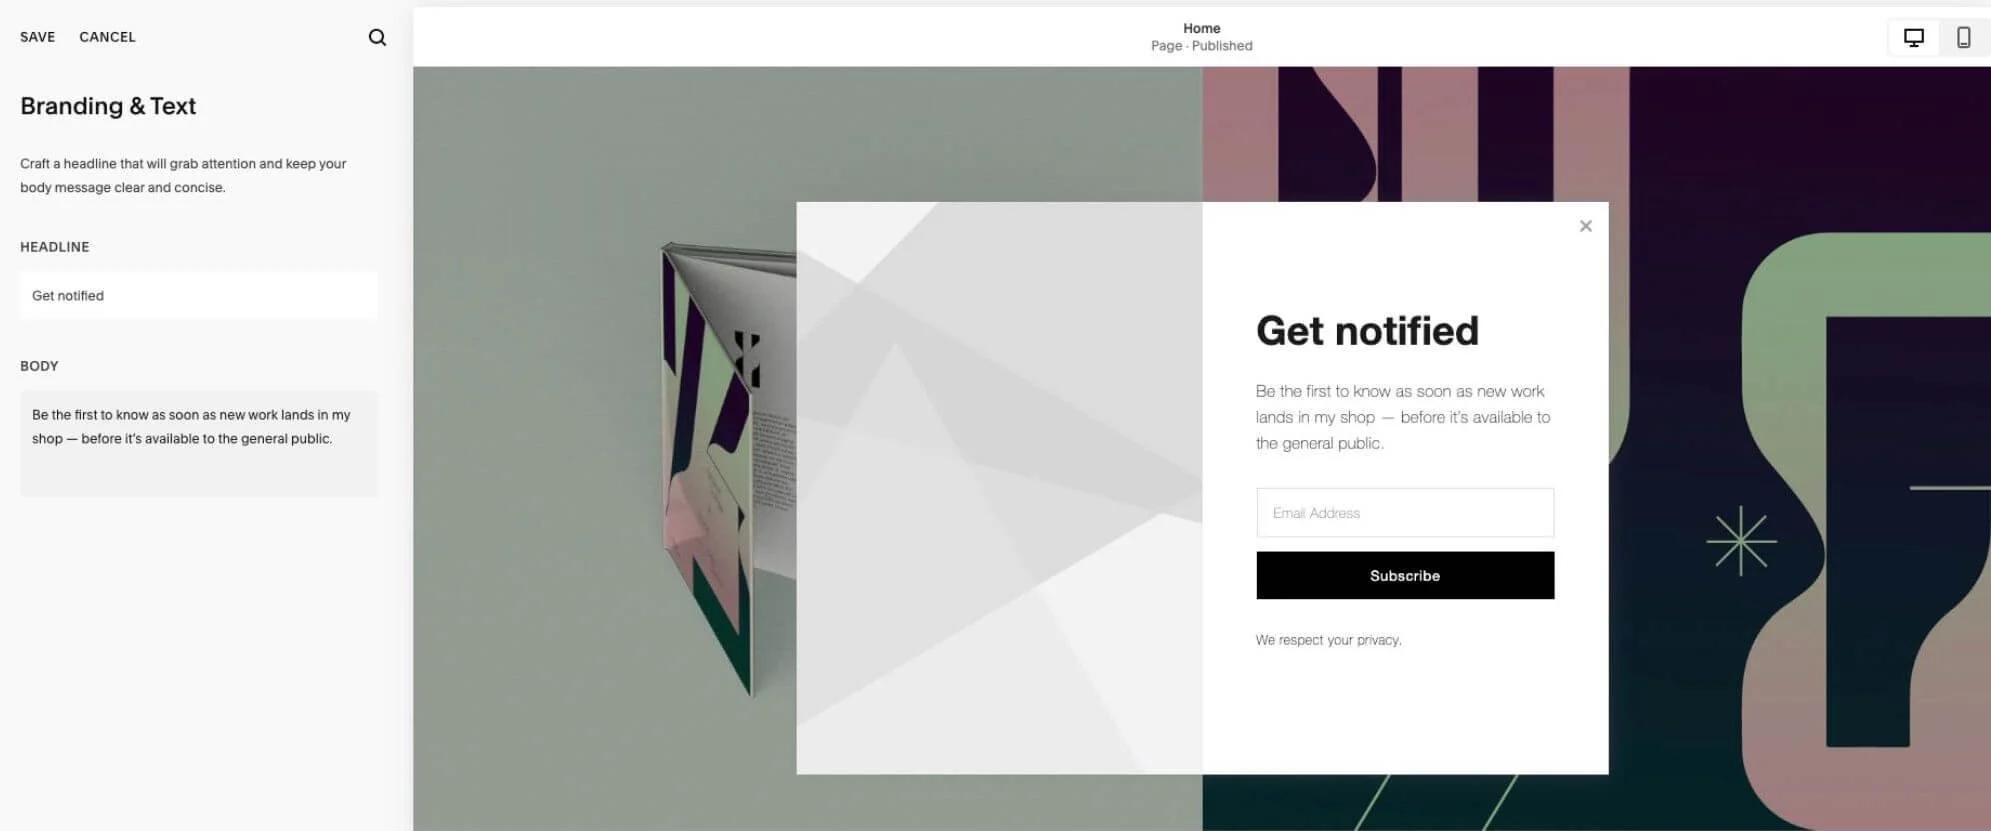
Step 6: Select “Content” Settings
Here is where you can edit the headline and copy inside your Pop-Up. In this example, I’ve used the pop-up to promote early access to the release of new work for sale in the shop.
Click save.
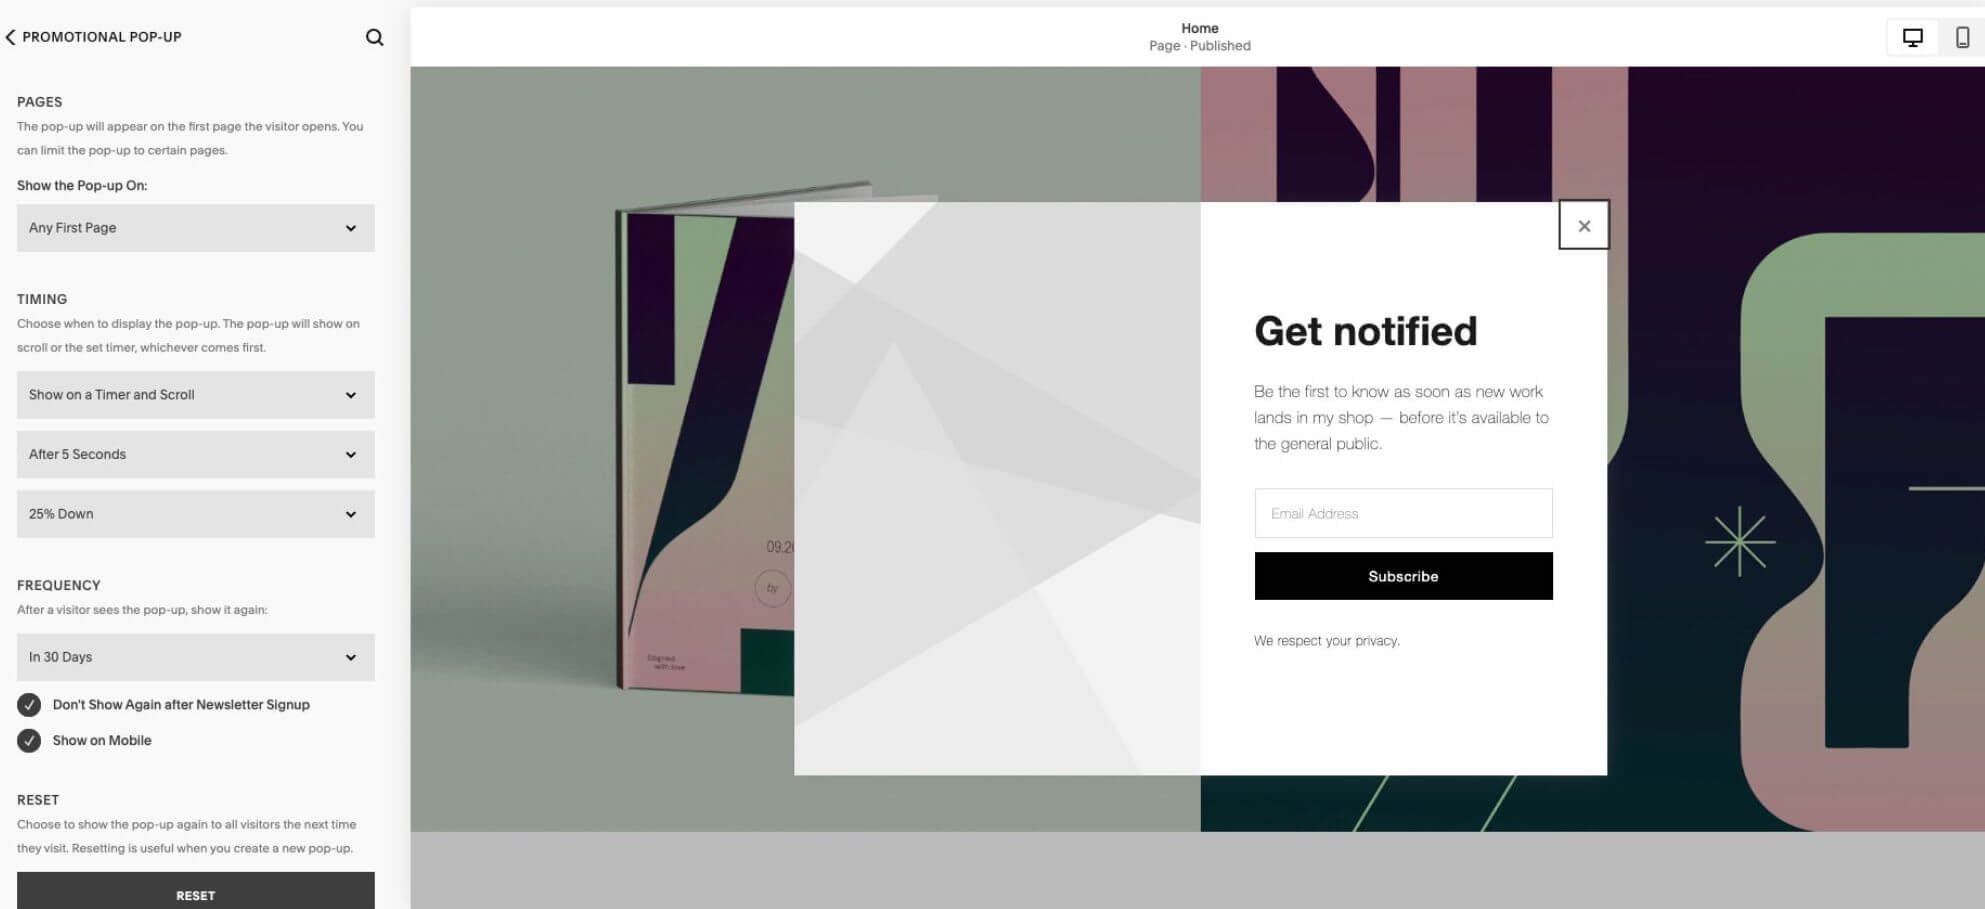
Step 7: Select “Display and Timing” Settings
This is where you set the pop-up's trigger, which determines where, when and how the pop-up appears.
SHOW THE POP-UP ON: If you select “any first page” that’ll show the pop-up to your visitor anywhere on your site, wherever they happen to land. The second alternative allows you to only show to the pop-up on certain pages. There is no right or wrong here.
TIMING: You can choose from options like "Time Delay” and "Page Scroll."
Here's a breakdown of each option and the optimal scenarios for using them:
Time Delay: Time Delay refers to setting a specific time period before a pop-up appears after a visitor lands on your website. This option allows you to control when the pop-up is triggered based on the visitor's time spent on the page.
Best to use when:
You want to engage visitors who have had enough time to explore your website and understand your artistic style or offerings.
You aim to capture the attention of visitors who have shown initial interest and are more likely to engage with your pop-up.
Page Scroll: Page Scroll triggers the pop-up to appear when a visitor has scrolled down a certain percentage of the page. This option allows you to engage visitors who are actively exploring your content.
Best to use when:
You want to display a pop-up when visitors have demonstrated a level of engagement by scrolling through a significant portion of your page.
You aim to capture the attention of visitors who are more likely to be interested in your artwork after engaging with your content.
FREQUENCY: Select how often you’d like return visitors to be shown the pop-up again. The default setting is 30-days. I’d recommend leaving the other two default settings below ticked on, as shown.
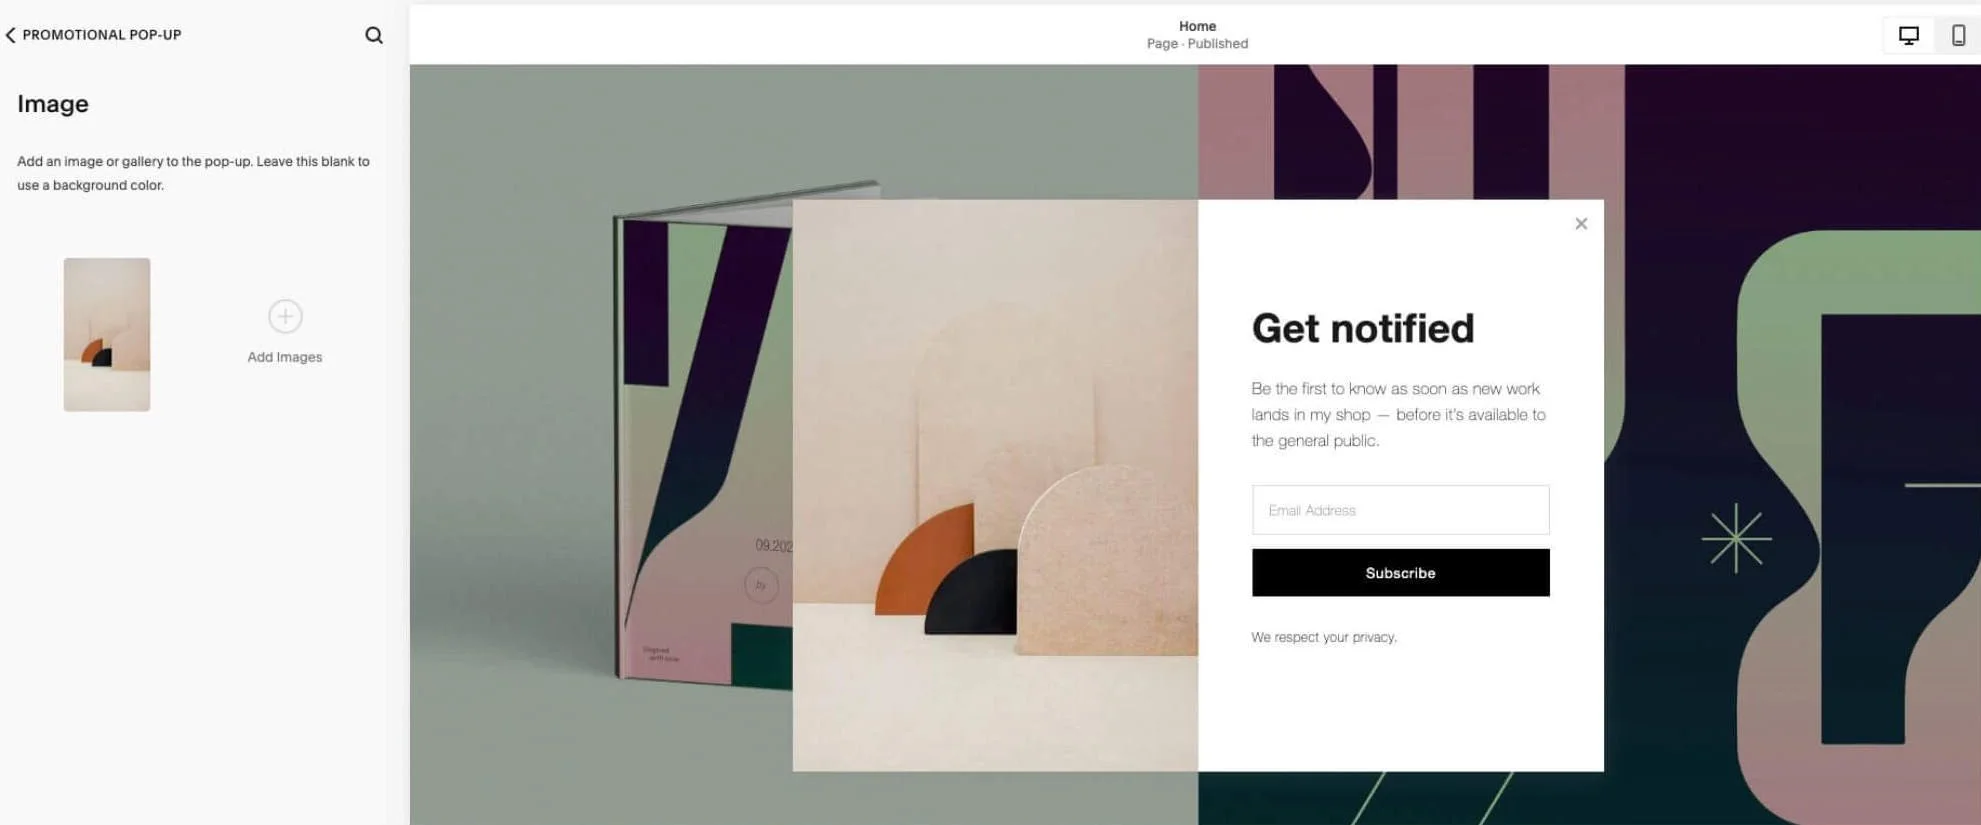
Step 8: “Add an Image”
After configuring the pop-up settings, it's time to finalize its appearance. Next, add an image to the pop-up.
You can upload more than one, if you’d like to give your pop-up a touch of animation and excitement.
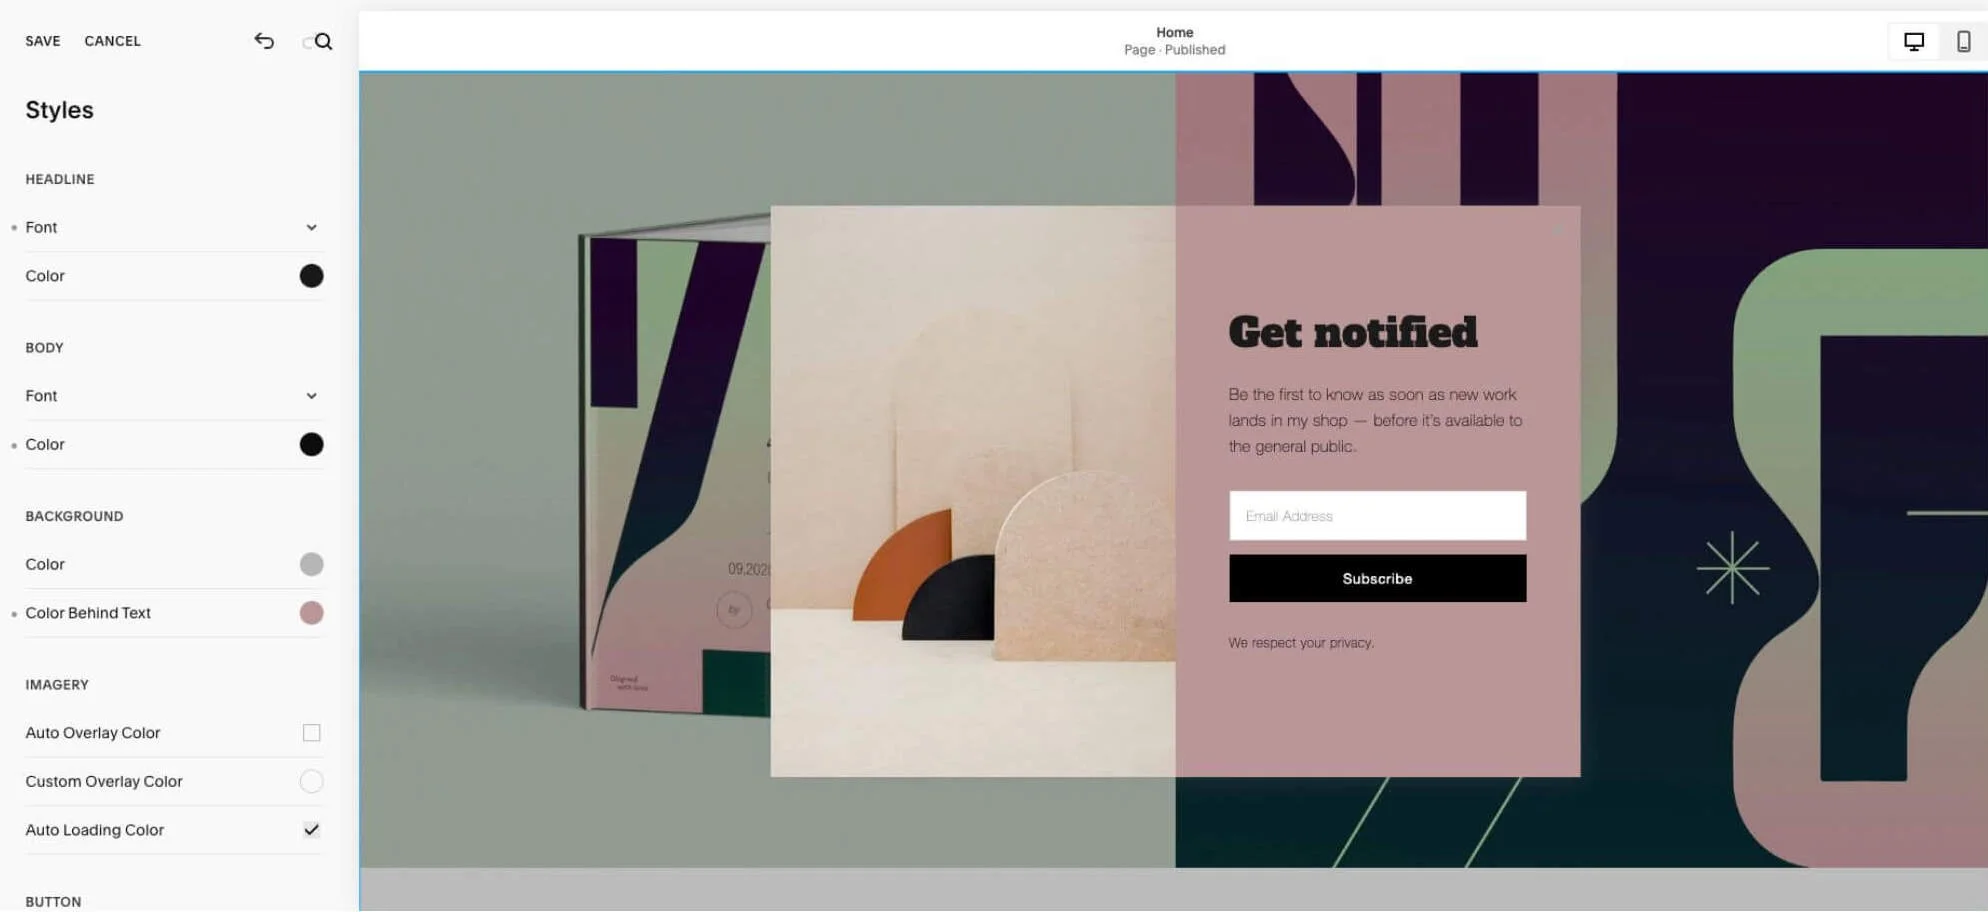
Step 9: Select “Style” Settings
It’s time to finalize fonts, colors and a host of other design-related details. Play with some of the options, and explore how you can add overlays, modify buttons and adjust mobile view settings.
Step 10: Enable the Pop-Up
Once you've finished designing and customizing your pop-up, click on “Display Pop-Up.” Remember, an upgrade may be required before your pop-up will display! Squarespace will save your changes, and the pop-up will be enabled on your website according to the settings you've specified.

Step 8: Preview and Test
To test the pop-up's functionality, check if it displays correctly, and make any necessary adjustments, you can open a new incognito window in your browser, and then navigate over to your site. If you’ve enabled the pop-up across all pages of your site, you should see it pop up within a few seconds.
You Did It!
Setting up a pop-up in Squarespace 7.1 is a straightforward process that doesn't require any coding skills. By following the step-by-step tutorial outlined above, you can create eye-catching pop-ups to engage your website visitors, promote offers, and capture valuable leads.
Remember to regularly review your pop-up's performance and tweak it as needed to optimize its effectiveness. Finding the right balance is key. While you want to engage returning visitors, it's equally important to respect their experience and avoid being intrusive or repetitive. By implementing best practices, you can create a positive and engaging pop-up experience that respects the preferences of your returning visitors.
With Squarespace's user-friendly interface, you’ll be off and running in this area and can effortlessly leverage the power of pop-ups to enhance your website's marketing strategy.
