Three Simple Ways to Customize the Built-in Domain in Squarespace
This article reflects an earlier phase of my work focused on practical guidance. Today, I apply these principles through private collaborations with artists and independent practitioners who want their work presented with clarity and intention.

When it comes to building a website, creating a unique and memorable online identity is crucial. One important aspect of establishing your brand's presence is having a custom domain name. You’ll have 3 options when it comes to customizing your domain.
The first option is to purchase a new domain from Squarespace, which means your domain and your website hosting will all be in one place. The second option is to connect a domain you already own, usually from a third-party domain site (ex: GoDaddy). This means your domain will remain with your existing provider, and your site hosting will be with Squarespace.
Your third option would be to use the built-in domain Squarespace automatically assigns to all websites; this domain can be easily changed to reflect your brand or personal preference. In this blog post, we'll guide you through the basic process of updating your domain in Squarespace 7.1, allowing you to take full control of your site's online presence.
Step 1: Access the Squarespace Website Editor
To begin, log in to your Squarespace account and navigate to the website you want to update. Click on "Go to" to access the Squarespace website editor. This will open up the customization options for your site.

Step 2: Open the Domains Panel
Once you're in the website editor, look for the "Settings" option in the left-hand menu. Click on it, and a dropdown menu will appear. From the options provided, select "Domains."

Step 3: Choose a Domain Option
This is where you can buy a domain, connect an existing domain you purchased somewhere else or customize the built-in domain that comes qirh every Squarespace site. Select one of the three options to proceed.
A) Buy a New Domain from Squarespace
Squarespace provides you with the flexibility to either purchase a new domain if you don’t already have one.
In addition, if you are a first-time Squarespace account holder, you’ll have the option to purchase a new domain from Squarespace directly, and get the first year free when you upgrade to a paid plan. To buy a new domain from Squarespace, click on “Get a Domain.”

Next, you’ll need to explore domain name options, and select one of the available domain options. Follow the prompts to complete your purchase. If you’re taking advantage of the free first year, the total will be adjusted upon checkout, so you’ll see the credit reflected then.
Follow the on-screen instructions to complete the process. Squarespace makes it easy!

B) Connect a Domain you Already Own
If you already own a domain that you purchased through a third-party provider such as GoDaddy, for example, select the option to "Use a Domain I own."

Next, you’ll be prompted to enter the URL for the domain you already own, and want to connect to your Squarespace site. Once you enter the URL, Squarespace will be able to find it, and next you’ll have to make a decision.
Your options are: 1) Decide if you want to transfer your domain to Squarespace and keep everything in one place; or, 2) Leave your domain with your existing provider, and simply connect it to your site on Squarespace.
There is no right or wrong answer here, but just keep in mind that if you keep them separate, you’ll have to remember that your domain renewal and site renewal dates will be different! Be sure to coordinate that carefully (auto-renew features help!) so your site never goes down.

If you selected the option to connect an existing domain, Squarespace will guide you through the necessary steps to link your domain to your Squarespace site (see example below).
This can involve updating DNS records or adding CNAME or A records, depending on your domain provider, but in most cases if you click on “get started” Squarespace will attempt to manage the integration process automatically for some of the most common services.
If you run into any issues, refer to Squarespace's comprehensive guides for specific instructions on connecting domains from various providers.

Follow the prompts carefully, and remember this process is not instantaneous, although in most cases, it can take a few minutes; occasionally it can take up to 24 hours.
After connecting your domain, Squarespace will verify the connection and configure it for your website. This process may take some time, so be patient. Once the verification is complete, your new domain will be active and associated with your Squarespace site.
C) Customize the Squarespace Built-In Domain
In the Domains panel, you'll see a third option labeled "Built-In Domain." Select this option to customize a domain that always, by default, contain “Squarespace.com” in the URL. I don’t normally recommend this option to clients who are focused on developing a professional presence and brand of their own, but it is an option.
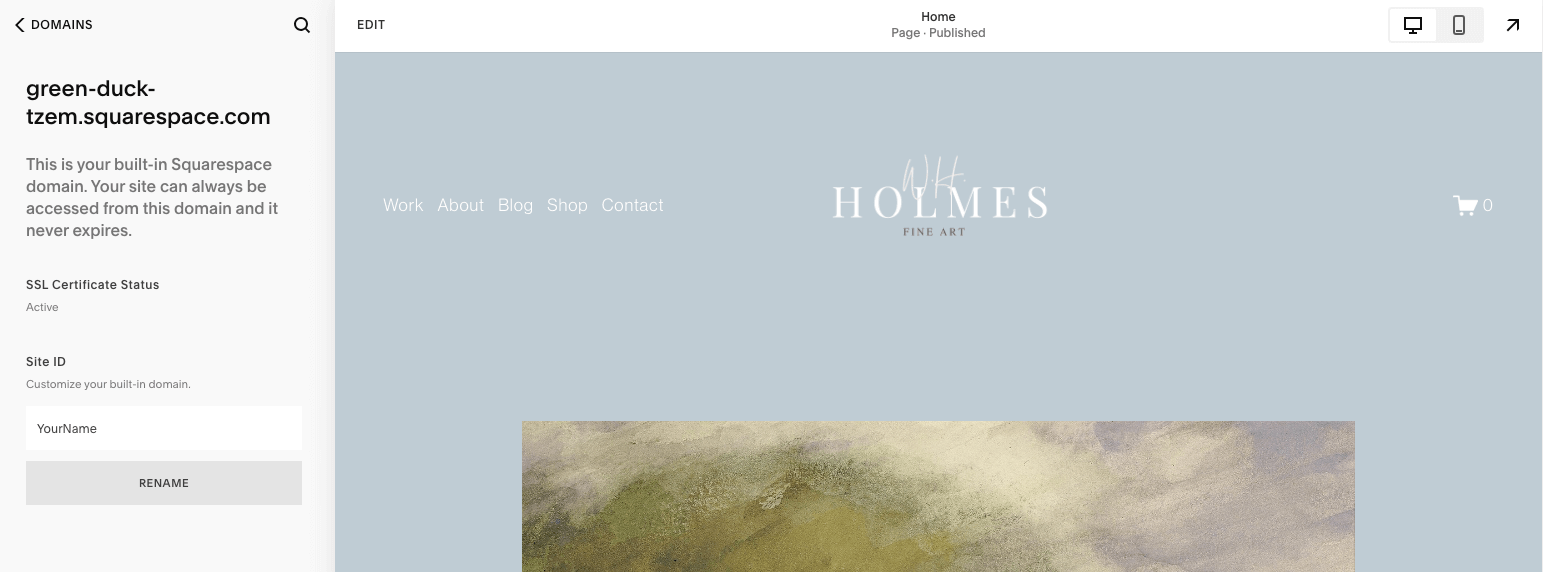
This built-in domain contains two parts. The first part can be customized. In the example below, you’ll see that the built in domain contains: “green-duck-tzem.squarespace.com” — this is the part you can change.

Under Site ID, customize your domain, which in most cases would be your name, your company name or your brand. In the example below, you’ll see “YourName.” Click “rename” to complete the process. Your new domain, in this example would be YourName.Squarespace.com.
Step 4: Verify Connection in your Domains Panel
In the Domains panel, if you purchased a new domain from Squarespace or connected an existing domain you'll notice that your newly connected domain appears alongside the built-in domain. In the example below, from my own site, you’ll see “Connected” in green letters next to the domain that is currently active. This ensures that visitors always see your custom domain in their browser's address bar.
If you’re using the built-in domain, there is nothing else you need to do.

Conclusion
By changing the built-in domain in Squarespace 7.1, you can establish a strong online identity that aligns with your brand or personal preferences. Remember that the process involves either connecting an existing domain or purchasing a new one, followed by verifying and making the custom domain the primary option for your site.
Take advantage of Squarespace's user-friendly interface and detailed guides to ensure a smooth transition. With a custom domain in place, your website will communicate professionalism and stand out in a competitive online landscape.
